This tutorial is one among many when it comes to using a Raspberry Pi to control wireless devices around the home. This post will show you how to read 4MHz codes using a Raspberry Pi. This tutorial was made to complement the Voice Controlling project .
CachadLiknandeÖversätt den här sidanjan. You don’t need any infrared receiver or transmitter, the only extra hardware you need beside your Raspberry Pi is a very cheap 433MHz . Mhz receiver and Raspberryapr 2016Send Receive 433MHz Signals For Home. Other questions and discussionsCachadLiknandeÖversätt den här sidanjuli 20- inlägg – författareAfter the best part of days trying to use a cheap £433MHz transmitter and receiver with Domoticz I must say it has been more difficult than I’d .
Raspberry Pi \u20View topic – Controlling 433MHz RF outlets with. Remote-controlled mains sockets with Raspberry Pi \u20Pygmalion,rh:pygmalion. Raspberry Pi \u20View topic – A few questions about my 433MHz. Send and receive 433MHZ signals with a Raspberry Pi,rh:lexruee.
Send-and-receive-433MHZ-signals-with-a-Raspberry-Pi. Home Automation with the Raspberry Pi controlling a Kambrook. Rapportera en annan bildRapportera den stötande bilden. Control anything electrical with the Raspberry Pi using 4MHz RF.
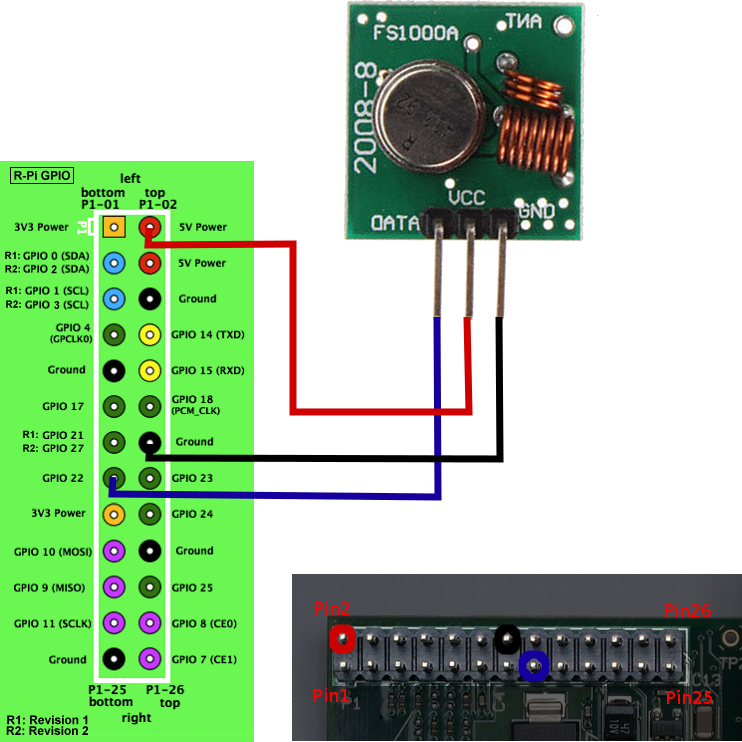
Next you need a 4MHz transmitter and receiver for the RPi.
![]()
In this blog post you’ll find instructions for using a Raspberry Pi to wirelessly control Etekcity. Therefore in this tutorial I want to show how two (or more) RaspberryPi’s can. Raspberry Pi’s (at a pinch only one will do); 4MHz Transmitter-Receiver Set . Tonight, the hack objective is to communicate with 433Mhz equipments using Raspberry PI.
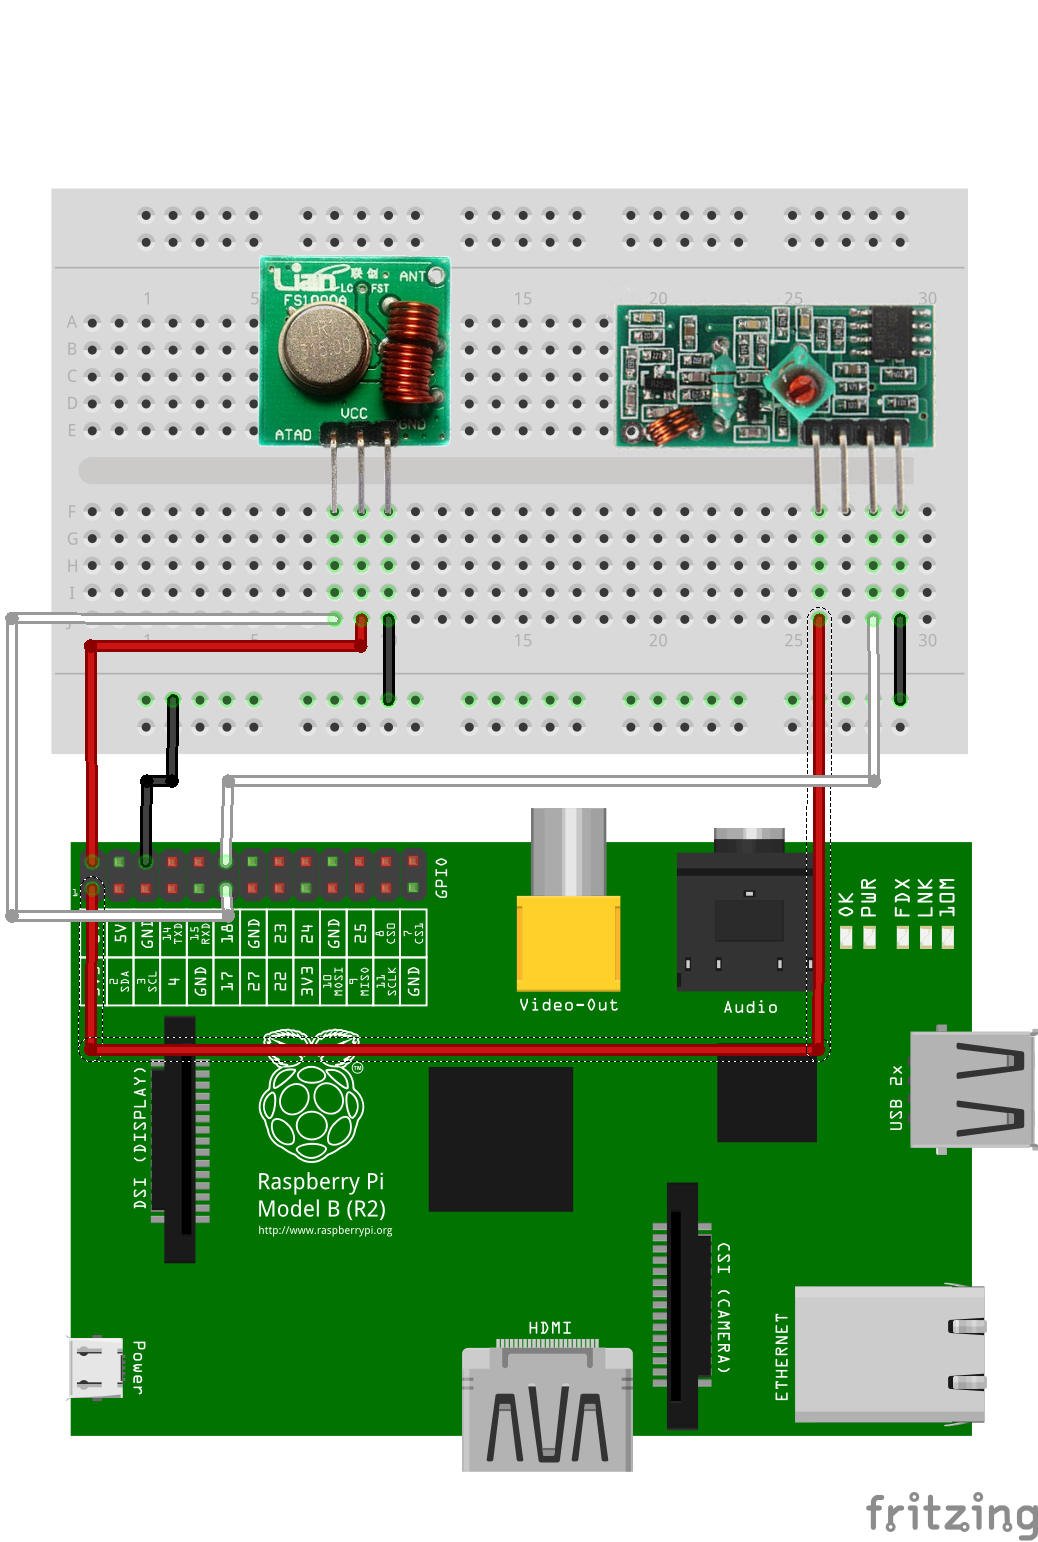
For this, I use a 433Mhz receiver from Itead Studio . I have a XD-RF-5V receiver wired to my Raspberry Pi listening with RFSniffer (433Utils).


